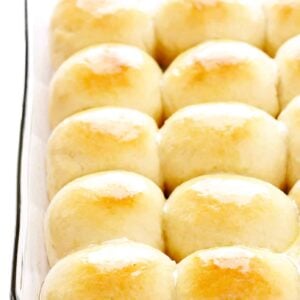
My favorite 1-Hour Soft and Buttery Dinner Rolls recipe is easy to make by hand or with a stand mixer and absolutely heavenly served warm out of the oven.

Is there anything better than a freshly-baked pan of homemade dinner rolls?
Actually, yes — this easy dinner rolls recipe that can be ready to go in just one hour!
This recipe has been my go-to for years and always yields the most perfectly soft, fluffy, buttery rolls. But I especially love it because the ingredient list is simple, the rise times are minimal, and the dough can be easily made either by hand or with the help of a stand mixer. And everything can come together quickly in just an hour or so, which makes this recipe more do-able on busy weeknights when you’re craving some homemade bread, and also super-helpful on holidays when you’re trying to multi-task all the things.
Many of you have also asked about make-ahead options with this recipe over the years, so I have updated the post with instructions for how to make the bread dough in advance. And I have also included some fun variations if you would like to make your rolls more garlicky, herb-y, cheesy, or whatever other add-ins sound fun.
Bottom line, this dinner rolls recipe is a keeper and never lets me down. So if you are looking for a good one to add to your repertoire, bookmark this one and give it a try!
1-Hour Dinner Rolls Recipe | 1-Minute Video

Homemade Dinner Rolls Ingredients:
Before we get to the full recipe below, here are a few notes about the ingredients that you will need to make this homemade dinner rolls recipe:
- Water and milk: These will serve as our base liquids for the bread dough. I used dairy milk, but you are welcome to sub in a plain plant-based milk (such as oat milk or almond milk) instead.
- Melted butter: Which we will both bake into the rolls and brush on top.
- Honey: To add just a hint of sweetness.
- Active dry yeast: This recipe calls for 1 tablespoon of yeast. So if you are purchasing your yeast in 0.25-ounce packets, you will need slightly more than one packet.
- Flour: I have only tested this recipe with all-purpose flour. But if you try out different flours, please let us know how it goes in the comment section below!
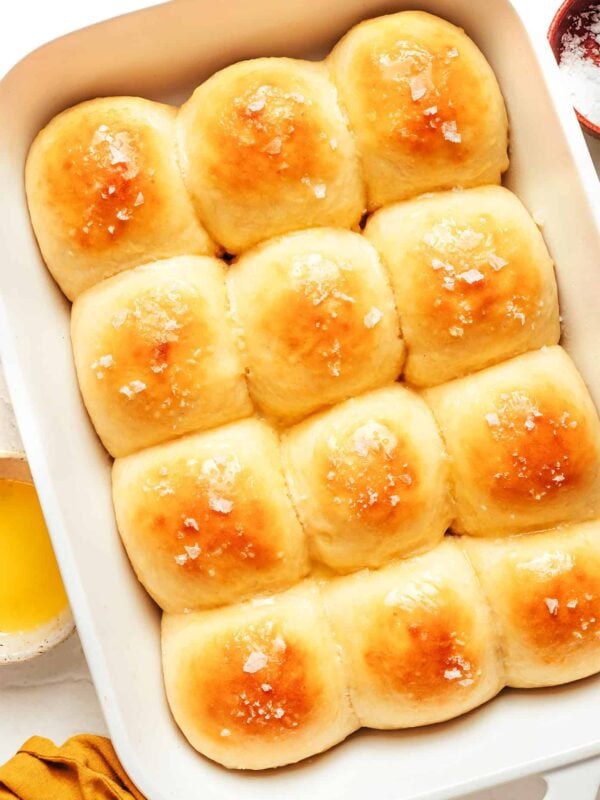
- Salt: Which we will mix into the rolls to bring out all of those delicious buttery flavors. Feel free to sprinkle a bit of flaky salt on top of the warm rolls just before serving too!

Tips For How To Make Dinner Rolls:
The full recipe is included below for how to make these dinner rolls, but here are a few helpful tips to keep in mind too:
- Be sure that your yeast has not expired. This is one of the most common reasons for why a batch of bread dough does not rise. Double-check the expiration date on any yeast that may be hanging out in your pantry. And if the yeast does not begin to puff and bubble up after 5 minutes once it has been added to the wet ingredients, toss out the batch and start over with new yeast.
- Double-check the temperature of the liquid ingredients. When heating the liquid ingredients (water, melted butter, milk and honey), it’s essential that they be within the temperature range of 100-110°F. If the mixture is too hot, it can kill the yeast. If it is too cool, the yeast may not activate. The mixture should feel warm and not hot to the touch, but I always recommend testing the mixture with a cooking thermometer just to be sure.
- Don’t skip the rise times. They are essential to helping the dough rise and create that soft and fluffy texture we’re going for.
- No worries about perfection. When portioning the dough into 12 rolls, don’t worry about them all being perfectly equal in size. They will all bake up together in the pan, and if some are slightly larger or smaller, hakuna matata. :)

Possible Recipe Variations:
Here are a few other possible variations that you could make to this dinner rolls recipe:
- Make-ahead option: For make-ahead dinner rolls, follow the recipe through the step that you shape the individual rolls and place them in the baking dish. Then tightly cover the baking dish and refrigerate for up to 48 hours. Transfer the dish to the counter and let it warm up to room temperature for 2 hours before baking, and then bake as directed.
- Make it vegan: Use plant-based milk and butter and your preferred sweetener in place of honey.
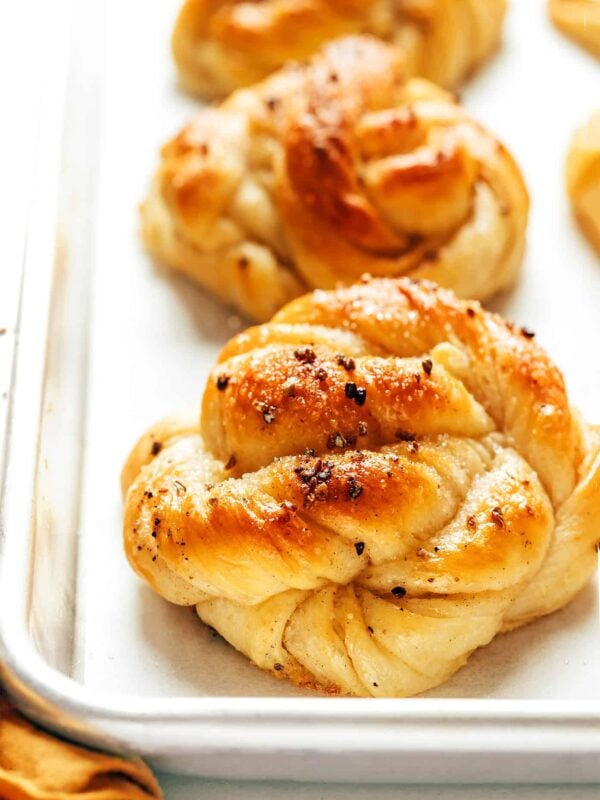
- Add garlic: Add in 1 teaspoon of garlic powder to the bread dough to make the rolls more garlicky, and/or you could also simmer some minced garlic with butter to brush on top of the rolls after baking.
- Add herbs: Add in 1 to 2 tablespoons of finely-chopped fresh herbs (such as rosemary or parsley) to the bread dough to add flavor to the rolls, and/or you could also mix some fresh herbs in with the melted butter to brush on top of the rolls after baking.
- Add cheese: You can also mix in 1/3 to 1/2 cup of freshly-grated cheddar cheese to make cheesy rolls. (Or I also love mixing in some freshly-grated Parmesan, and then sprinkling some on top of the rolls during the final 5 minutes of baking.)

More Favorite Bread Recipes:
Looking for more easy bread recipes to add to your repertoire? Here are a few of my faves…
- No Knead Bread
- Homemade Buttermilk Biscuits
- Rosemary Focaccia Bread
- Honey Beer Bread
- Healthy Banana Bread
1-Hour Soft and Buttery Dinner Rolls
Ingredients
- 1 cup water
- 2 tablespoons melted butter
- 1/2 cup milk
- 2 tablespoons honey
- 1 tablespoon active-dry yeast*
- 3 1/2 to 4 cups all-purpose flour
- 1 teaspoon fine sea salt
- extra melted butter, for brushing on top
Instructions
- Prep your oven and baking dish. Heat the oven to 400°F. Grease a 9 x 13-inch baking dish with cooking spray, and set aside.
- Heat the liquids. In a microwave-safe bowl (or saucepan, see below), stir together the water and melted butter, then add in the milk and honey and stir until combined. Microwave the mixture for 1 minute and give it a stir. Continue microwaving the mixture in 15 second intervals, until it reaches 110°F. It will be warm but not hot to the touch. (*Alternately, you can heat the mixture over medium-low heat in a saucepan until it reaches 110°F.)
- Add yeast. Pour the liquid mixture into the large bowl of a stand mixer. Sprinkle the yeast evenly on top, give it a quick stir with a fork to combine, and let the yeast activate for 5 minutes until it is foamy.
- Add dry ingredients. Add in 3 1/2 cups of flour (not all of the flour) and the salt.
- Mix. (See alternate instructions in the notes below for how to knead the dough by hand.) Use the dough-hook to mix in the dry ingredients on medium-low speed until combined. If the dough is sticking to the sides of the bowl, add in 1/4 cup more flour at a time until the dough pulls away from the sides of the bowl and is only slightly sticky to the touch. (Only use up to 4 cups of flour total.) Continue mixing on low speed for 4-5 minutes until the dough is smooth. Then form the dough into a ball with your hands and transfer it to a greased bowl.
- Let the dough rise. Cover the bowl with a damp towel or paper towel, and let it rise briefly for 15 minutes.
- Form the rolls. Gently punch the dough down and divide into 15 equal-sized pieces. Form each piece into a ball and place the dough balls in the greased baking dish. Cover the dish again with a damp towel or paper towel and let the dough balls rise for an additional 15-20 minutes.
- Bake. Uncover and bake for 15 minutes, or until the rolls are lightly golden brown on top and cooked through.
- Brush with more butter. Transfer the baking dish to a wire cooling rack and brush the tops of the rolls with melted butter.
- Serve warm. Then serve warm and enjoy!

I haven’t tried yet, but this recipe is very much like my recipe that I got forty years ago from our local extension office. It was found in a beautiful booklet brimming over with bread recipes made with fleichmans yeast. The only thing I would do different is use bread flour, it is a really good flour for making breads nd priced the same as all purpose flour. Later on in the years I began making the dough in a bread maker machine. Doing this didn’t necessarily save time but simplified the process I haven’t mace homemade rolls in years, but now I’m inspired to make a batch for the next family gather. Thanks so much for sharing.
Made these with almond milk, dairy free butter, instant yeast (not active dry) and I doubled the recipe and they were delicious!! I do make bread often so I am familiar with how it should look and feel but the instant yeast worked great and honestly we all felt like they were better the second day – oddly enough. I have 4 boys and all of them loved them – so basically that means this recipe is a keeper.
Thanks for sharing your talent!
Made these rolls yesterday.
I only use instant yeast and when I buy it I buy 2 1lb blocks for $5.00 from Sam’s..
I just put all the dry together in mixing bowl wisk together then add the wet.
These rolls were ready in no time.
Great recipe
Thanks for sharing
Roy P
South Carolina
Hello ! I tried this recipe twice. But both times the rolls came out hard (not soft at all) and it feels doughy in the inside. Baking time 20mins + till brown..
Perhaps try new yeast? Mine came out great, just had to add additional flour. I also baked on cast iron, as the only 13×9 pan I had was holding a turkey. I so turned down my oven to 385°. I am in AZ at 5400 feet elevation, so we never get the kind of crumb here that you can get at sealevel.
These are SO GOOD! And not super sweet like the other yeast rolls Ive made. This is definitely my go to recipe also for those who are worried I’ve made this recipe multiple times with only one packet of yeast and it turns out amazing.
These rolls are delicious and true to the time the recipe says it will take. They are a great choice when in a hurry, yet wanting to prepare homemade bread for your group.
Yummy
These rolls are amazing. It was so incredibly easy to make them. What I really liked about it was how they were so quick to make. Under an hour is right! They are flaky and delicious. I usually don’t leave a review, but these need one. 10 Stars! :-)
Can you make this dough a day or 2 ahead of time and bake it right before the meal? If so, at what point do you put the dough in the fridge and come back to it?
I made these for thanksgiving AND Christmas last year! I’m planning to make them again for Easter. They’re so yummy!
This is my first time to make a bread and I’m so happy with the result. It’s so easy and turned out yummy. Thumbs up for myself! :) It’s also good to insert some cheese when re-heating. Love it! Thanks so much for this recipe.