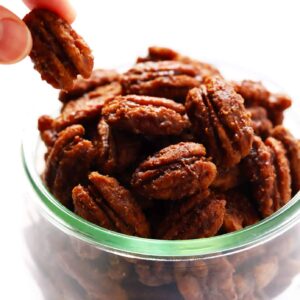
This 5-ingredient Maple Candied Pecans recipe is naturally sweetened with maple syrup, and perfect for snacking, sprinkling on salads, and giving as homemade holiday gifts.

Guys, I learned a fun new trick this season!
For those of you who love candied pecans as much as I do, but are trying to move away from refined sugars and more toward naturally-sweetened recipes nowadays, a friend turned me onto a simple method for how to make the most delicious candied pecans with one simple natural sweetener…
…maple syrup. ♡ ♡ ♡
And bonus? This recipe is made on the stovetop and skips using the traditional egg whites, so it’s naturally-sweetened, gluten-free and vegan, to boot. All you need is a pile of pecans (or your choice of nuts), some real maple syrup, ground cinnamon, salt and a pinch of cayenne. And after 20 minutes of simmering and stirring, an absolutely delicious batch of spiced candied pecans will be yours to enjoy. I love snacking on them plain, or sprinkling them on everything from salads to parfaits to roasted veggies and more. Or if you feel like sharing, candied pecans are always a fantastic homemade holiday gift to give as well.
Here’s how to make them!

Maple-Sweetened Candied Pecan Ingredients:
To make this naturally-sweetened candied pecans recipe, you will need:
- Raw pecan halves: Or this recipe works well with everything from almonds to walnuts, pistachios, cashews, peanuts, or any other favorite nuts as well.
- Maple syrup: 100% real maple syrup is the way to go here. (Barclay’s uncle gave us this cute little bottle above for Christmas, which we have loved. Thanks, Uncle Rick!)
- Ground cinnamon: Really, any kind of warming spices will work here. I typically just stick with cinnamon and cayenne, but feel free to add in some ginger, nutmeg, allspice, cloves, or any other spice blends (like pumpkin pie spice) that you love.
- Ground cayenne: I’m a big fan of adding a subtle kick to candied pecans, but feel free to add more/less cayenne to taste.
- Salt: We will also add in some fine sea salt, which will help to bring out all of these delicious flavors.

How To Make Candied Pecans:
So here’s the thing about this naturally-sweetened version — it’s super simple to make, but it does require more time and patience than the traditional just-pop-a-tray-in-the-oven version of candied pecans. In order to simmer the maple syrup so that it evaporates but doesn’t overcook the pecans, we’ve got to cook the mixture low and slow. (Trust me, I tried cooking these on higher heat a number of ways, and the results were no good.)
So grab a cup of coffee and put some music on — or better yet, multitask these guys while you’re making a pot of soup or some other recipe — and settle in for some quality time with your sauté pan. Here’s how to make them!
- Combine all ingredients in a sauté pan. Use a spatula or a spoon to toss all of the ingredients together in a medium sauté pan until the pecans are evenly-coated and all of the spices have dissolved into the maple syrup.
- Bring the mixture to a simmer. Cook on medium heat until the maple syrup comes to a low simmer. (We’re looking for small, gentle bubbles here — not a vigorous boil.)
- Continue simmering until the liquid has evaporated. Then reduce heat to medium-low (or whatever temperature works on your stovetop to maintain a low simmer). Continue simmering the mixture for about 20 minutes — stirring often — until the liquid in the maple syrup has evaporated and its sugars have crystalized. The maple syrup will go through the following stages:
- Thin and liquidy: It will simmer and bubble easily, and the pecans will be lightly coated. Stir every 1-2 minutes or so.
- Thick and syrupy: The bubbles will start to get thicker and slower, and the pecans will start to stick together more (<– be sure to keep breaking them up as you stir). Stir every 1 minute.
- Crystalized and grainy: Once the maple syrup has almost completely evaporated (there may still be some tiny bubbles on the bottom of your pan), you’ll notice that it starts to crystalize and look like microscopic little grains of sugar on the pecans. This is good — it means that they’re nearly ready to go! Once the maple syrup starts to crystalize, go ahead and cook the pecans for 1 more minute. Stir often, every 20 seconds or so.
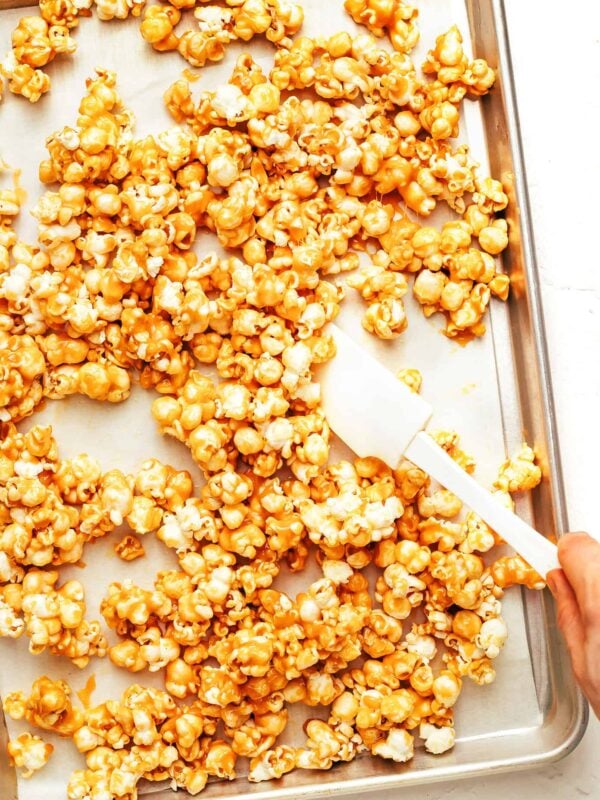
- Spread the pecans out on parchment paper. Then immediately pour the candied pecans out onto a flat surface (like a cookie sheet) covered with parchment paper. Use your spatula to break apart the clumps (or you can do this with your fingers, once the pecans have cooled a bit). Then let them cool until they reach room temperature.
- Enjoy! Then go ahead and dive for a taste immediately! Or, feel free to store the candied pecans in an airtight container for up to 2 weeks.

Possible Variations:
Want to mix things up? Feel free to:
- Make them spicy: Feel free to double or triple the cayenne for an extra kick.
- Sprinkle with flaky sea salt: For a different twist, skip adding salt at the beginning of the recipe. And instead, sprinkle some flaky sea salt on at the very end once you spread the pecans out on the parchment paper. (I love adding smoky sea salt for extra flavor too.)

Three Quick Notes:
To prevent burning: After having tested a half dozen batches of these, I can vouch that they are easy to burn if you’re not careful. Keep the heat nice and medium-low, stir them often (especially during the final few minutes of cooking), and resist the urge to turn up the heat to speed things along. High heat will make the syrup evaporate more quickly, but it will over-toast the pecans and can also burn the syrup more easily. Low and slow FTW. :)
To scale the recipe: Feel free to scale this recipe up or down, as needed. I have made a double batch, which still worked well in a medium sauté pan. Or you can easily make a half batch too. Cooking time may vary slightly according to the size of your batch and pan.
Texture: As someone who has made and loved traditional candied pecans for years and years, I just wanted to note that the maple-sweetened (and vegan) version will not get quite as crispy as the sugary-eggy version. They still taste just as delicious (or arguably, even more so with that yummy maple syrup flavor). But they are a bit softer and don’t have very crispy edges.
Maple Candied Pecans
Ingredients
- 2 cups raw pecan halves
- 1/2 cup real maple syrup
- 1 1/2 teaspoons ground cinnamon
- 1/2 teaspoon fine sea salt
- 1/8 teaspoon ground cayenne
Instructions
- Combine all ingredients in a sauté pan, and toss with a spoon or spatula until the pecans are evenly coated and the spices have mostly dissolved into the maple syrup.
- Cook the mixture on medium heat until the maple syrup comes to a low simmer, stirring occasionally. (We're looking for small, gentle bubbles here -- not a vigorous boil.)
- Reduce heat to medium-low (or whatever temperature works on your stovetop to maintain a low simmer). Continue simmering the mixture for about 20-25 minutes -- stirring often -- until the liquid in the maple syrup has evaporated and its sugars have crystalized. The maple syrup will go through the following stages: (1) Thin and liquidy: It will simmer and bubble easily, and the pecans will be lightly coated. Stir every 1-2 minutes or so. (2) Thick and syrupy: The bubbles will start to get thicker and slower, and the pecans will start to stick together more. (3) Crystalized and grainy: Once the maple syrup has almost completely evaporated (there may still be some tiny bubbles on the bottom of your pan), you'll notice that it starts to crystalize and look like microscopic little grains of sugar on the pecans. This is good -- it means that they're nearly ready to go! Once you notice that the maple syrup has just begun to crystalize, go ahead and cook the pecans for 1 more minute. Stir often, every 20 seconds or so.
- Immediately pour the candied pecans out onto a flat surface (like a cookie sheet) covered with parchment paper. Use your spatula to break apart the clumps and spread the pecans out in an even layer. (You can also do this with your fingers, once the pecans have cooled a bit). Then let them cool completely until they reach room temperature.
- Serve immediately and enjoy! Or, feel free to store the candied pecans in an airtight container for up to 2 weeks.

Really should have at least 1/2 tsp cayenne pepper in the mix. I use closer to 1 tsp, gives it a bit of a kick
Great recipe, no white sugar which is great. Thank you 😊
That was incredible. A fun science experiment about how you can get sugar to crystallize.
First time making them and will definitely make them again. So easy to make and yummy.
I added extra cayenne and 1/4 tsp of ground cloves.
Ooooo …so good!!!
These came out perfect! I added almost twice less maple syrup because I ran out but they were a breeze to make and absolutely delicious. I did use a little less salt since I used less maple syrup. I’ll definitely be making this again. Although Ive made numerous different candied nuts before it was my first time using maple syrup and the step by step instructions were a godsend. Thank you!
I made this following the recipe exactly – with just some playfulness with the spice combination. Simple perfection. Thank you! I will make this many, many more times.
Instead of watching the behavior of the syrup, get a candy thermometer and bring syrup to 243-245 degrees. Add a bit of cooking oil before boiling the syrup and use a fairly deep pot so as to avoid boil over. Don’t turn your back on it and adjust burner temp accordingly to keep the mixture in the pot. Once at temp, dump in pecans and stir until crystallized off heat 2-3 min.
this recipe cooked up exactly as directions said. so easy to follow. SO GOOD!!!!!!!!!
Had this recipe by a co worker 5 years ago somewhere it lays and I can’t do Will print this out for my heritage book.
I made this but x4 to have enough for family .They love these. I love your direction and description of simmering.Took me 35 minutes to make because of quantity and I real simmer very slowly fearing of burning. This recipe came out genius and coating harden perfectly. You recipe in now in my forever book.oh no cayenne for us .Also used Vermont M apple syrup got from Walmart dark amber and is the best Maple syrup I’ve ever had since I was a kid in Ohio who’s Mom made our own maple syrup. Thank you for terrific recipe 100 %.
They were absolutely delicious! I’ve been making roasted pecans for many years, but the switch was a good one. Yummy!!!
Wow, so delicious!!! I used walnuts and my maple is dark robust and oh my goodness these are so amazing on my kale salad with maple mustard vinaigrette, pickled onions,
farro and goat cheese. Thank you for this recipe!