For years, readers and bloggers have asked me about my shooting setup. And I always tell them that it’s nothing fancy. (At least, nothing fancy like some of the professional studios I have worked in with food styling.) However, I think that’s what I love about food blogging. There are hundreds of food bloggers around the world who are taking amazing photos…with very minimal studios and equipment…which I think is awesome.
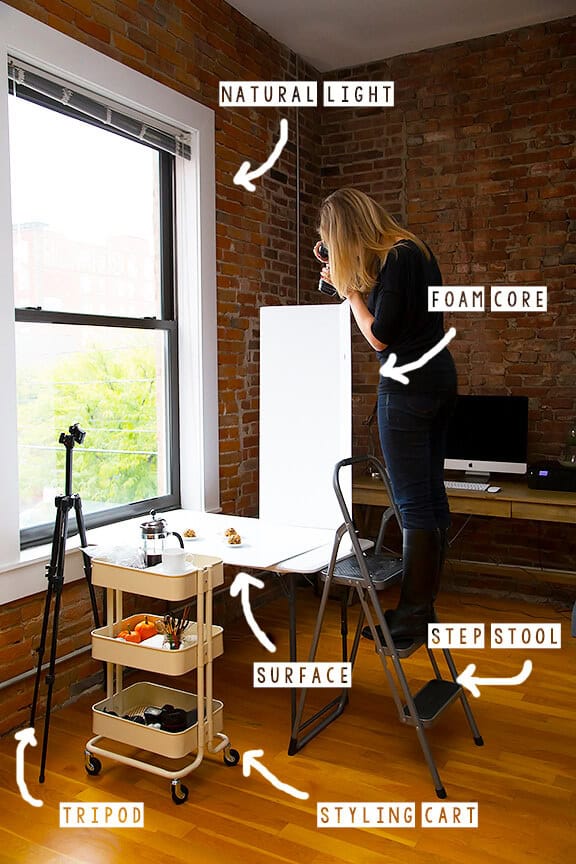
So for anyone who’s interested, here’s what my home shooting setup looks like. I live in a loft in downtown Kansas City that I chose because it has big windows. But don’t be fooled by that light — I bumped up the exposure on this pic (as I do on almost all of my pics). With the exception of about 3 hours of the day, the lighting in my place is actually not ideal. Often times, it is not that bright, based on various shadows that come in from trees and buildings. And the curse of living in a place with all of my amazing brick walls is that when the light is shining in my loft, often times I’m seeing red. Red. Red. Red.
So I shoot between about 2-5pm most days when the light is a little cooler in tone, and not crazy bright and casting red hues everywhere, and hopefully my food is cooked and timed right so that it’s ready to go. A part of me definitely wishes I had more hours in the day for shooting. (And yes, I have tried all kinds of artificial lighting and still can’t beat the sweet light that comes in that big window during that small window of time.) But no complaints. I love my loft and I love getting to shoot at home, so I’m sticking with it.
As for my setup, here are my basics:
Surface: I shoot on a $30 folding table I purchased at Target that has adjustable height, although I prefer it at window height for lighting. Most of the time I shoot on a white piece of foam core (which I replace regularly due to spills and stains), but I also have a handful of other wooden and metal surfaces that I keep nearby. Most of the time, I shoot my subject (i.e. food) a foot or two away from the window, depending on the time of day and how bright it is outside. And most of the time, I shoot backlit.
Tripod: You can learn more about my specific tripod in my post about My Camera Accessories. But the tripod most often goes in the place of the step stool when I’m not standing on it, when I’m shooting backlit.
Styling Cart: This cart was a recent purchase from IKEA which (finally!!!!) came to Kansas City this month. I know that Pinterest says you can do a million things with this cart. I use it as my portable styling cart with any ingredients or supplies I may need nearby. I will be sharing about my specific food styling tools in an upcoming post. (Stay tuned.)
Step Stool: Best $25 I have spent in the last year. Oh man, I used a little kids’ bathroom stool for years, which increased my ability to shoot overhead a bit. But I finally picked this step stool up at Home Depot a few months ago, and I now use it almost every single day. It’s super sturdy, and I love it. (Also good for reaching the top cabinets in my kitchen!)
Foam Core (Reflector): I own a handful of real reflectors, but use this recycled (a.k.a. food-stained) $5 piece of foam core board that I scored and folded down the middle as my main reflector for shooting. It is essential for bouncing the light on the front of my subject when I’m shooting backlit. And if it isn’t enough, often I’ll hold or setup a second reflector on the left/front side of the food as well to help light a certain part of the subject. I have a handful of these folded foam core boards in different sizes too that are the cheapest, easiest reflectors I’ve found.
Natural Light: Finally, as I’ve said, my natural light source is this window. I kept the cheap blinds on it because they actually do a fantastic job of shaping the light while I shoot (i.e. making things darker or lighter). I also have some of those cheap sheer white sheer curtains that I sometimes put up on the window to diffuse the light. But honestly, those little white blinds do wonders.
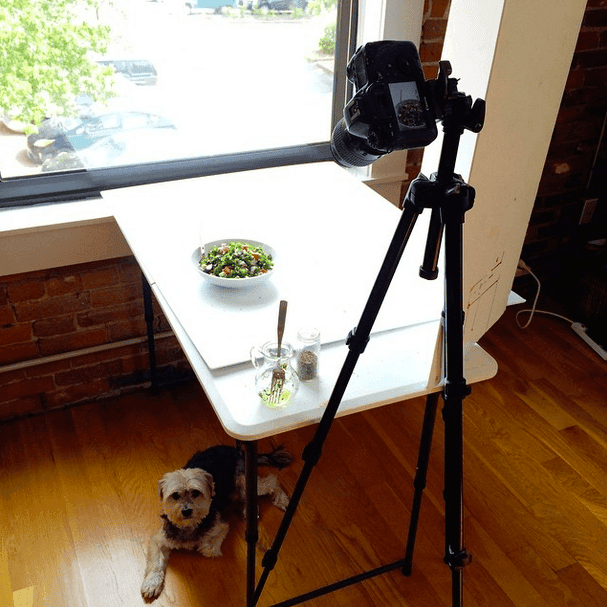
Oh, and I can’t forget to give a shout out to my trusty assistant who sits under the table during all shoots — my crumb-catching, sun-bathing, power-napping, tail-wagging pup, Henry. He’s the best part about working from home. :)
whos got two thumbs up and wants that styling cart now…
Biggest question… who took this photo? :D Thanks for the tips!
Thank you for sharing! I loved all your tips and steps! You make it seem effortless and I appreciate you sharing it all~
I am in the mist of creating my own little corner of our house into my photo studio (ha ha ) the inside of an armoire that I have finally painted out all white – it actually has the best light (it’s in our family room which is all windows) and the rest of the cabinets I am using for storage of propping etc. My brilliant idea – at least I think so…LOL if I do say so myself came to me while I was trying to sleep one night but was instead thinking of ways to make it less of a project all the time to take these photos. I plan on doing mock ups for my website, slider and shop but if I may, – I have a quick question if you don’t mind? When you mentioned the cheap shades, do you have them down where you are shooting the shot and what do you concerted the best light of day – I know you said 2-5 for your area but why then? Thanks again…it was a great tutorial!
That is so cool, I am taking classes at the local college and love to take pictures of food and products. I love all the little ideas that you gave..
thank you
Thanks so much for the info and showing your photo station. I’m looking to build one and this really helps.
Cheers!
No problem, we’re happy to help Beata! :)
Hi Ali, thank for sharing this, really inspiring. I have a question, for foam core / reflector, do that necessary? Is there any big different with and without?
Oooh yes, I’m a big fan of the reflector. It’s the main control you have over shaping the light. If you don’t have foam core, a simple piece of white paper will also go a long way. :)
Great tips! I’m on a tight budget right now but looking for ideas to improve my food photography. My dog loves to taste test but doesn’t like to pose. I’ll be back to see what’s new.
Thanks Ashley, we’re glad you found this helpful! :)
Ali, thanks for the visual! I get a kick from seeing other people’s workspaces. Oh, andI just recently moved and seeing your foam boards made me realize I have to find mine!
Thanks!
I loved reading this post! So much information I’m looking forward to reading your other posts about blogging soon!!
Thanks, Jenna! : )
Great tips. Which direction is your window facing?
This is such a great tutorial. We have been following your blog for a while now, and you inspired us to start our own. You have such great recipe ideas and tutorials that have helped us greatly! Keep us the good work!